 Deutsch
 Español
 فارسی
فارسی
 Italiano
 Nederlands
 Türkçe
This quick tutorial will give you an overview of Recogito's most important features. You will learn how to:
- Upload texts and images
- Create annotations
- Identify and map places in your documents
- Export your data in order to re-use it outside of Recogito
- Invite other users to work with you
What is Recogito?
Recogito is an online platform for collaborative document annotation. It is maintained by Pelagios, a Digital Humanities initiative aiming to foster better linkages between online resources documenting the past.
Recogito provides a personal workspace where you can upload, collect and organize your source materials - texts, images and tabular data - and collaborate in their annotation and interpretation. Recogito helps you to make your work more visible on the Web more easily, and to expose the results of your research as Open Data.
This tutorial will teach you the essentials of working with Recogito. To complete it, you need a Recogito account, and two sample documents: a plain .txt file with some text, and an image file.
Tip: Open this tutorial in a separate browser window (or tab) so you can see it while you complete the steps.
Step 1. Upload a Document
Documents are used to organize your materials in Recogito. Each document can consist of multiple files. But for now, we are just going to upload a document consisting of a single text file.
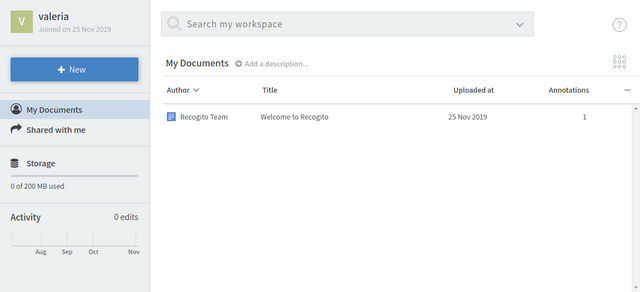
Click New.
To upload a new text document
- In the drop-down menu, click File upload and select the file in the file browser.
- Alternatively, you can just drag and drop a file into your workspace with your mouse.
Congratulations! You have imported your first document into your workspace.
To upload a new image document
Repeat the steps above to create another document from your image file. Recogito may take few seconds to convert your image into a zoomable image. But more on that later.
Step 2. Create Annotations
Open your text document by double-clicking it in the list. This will take you to the annotation view.
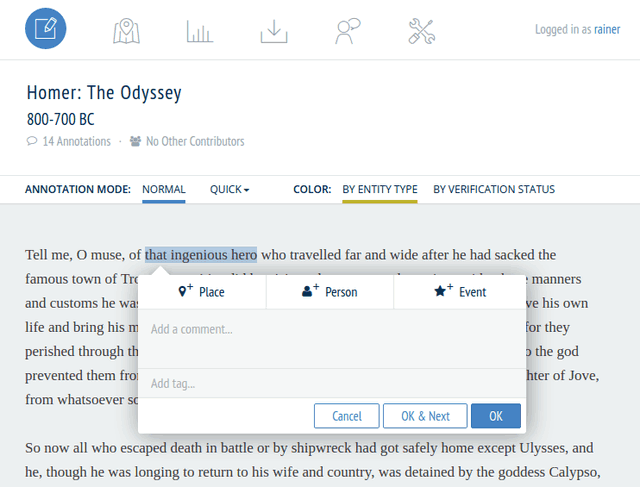
To create a text annotation
Select text like you would in any word processing tool: either by clicking and dragging with your mouse, or by double clicking a word. You can add text comments and tags, as well as identify the selected text as a Place, Person or Event. (We will learn more about how to deal with places in a minute.)
Try experimenting with the annotation editor. You can change or delete each part of an annotation seperately, after you have created it. (To delete a tag, click on it first to get a delete button.) Deleting all parts of an annotation will also remove the highlight from the text.
To create an image annotation
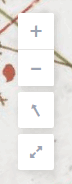 Open your image document. Recogito has a zoomable view so you can
navigate even highest-resolution images easily. Zoom using your mousewheel or
the + - buttons in the upper right
corner. On touch devices you can also use a "pinch" gesture. Pan by dragging and
releasing the image.
Open your image document. Recogito has a zoomable view so you can
navigate even highest-resolution images easily. Zoom using your mousewheel or
the + - buttons in the upper right
corner. On touch devices you can also use a "pinch" gesture. Pan by dragging and
releasing the image.
You can rotate the image at arbitrary angles. On a desktop computer, hold SHIFT + Alt while dragging with your mouse. On touch devices, use a pinch gesture. Use the button with the single arrow to quickly rotate the image back to its original orientation.
Let's create our first image annotation. In the toolbar, there is a drop-down menu where you can switch between Recogito's different selection modes: Point, Rectangle and Tilted Box. Select Point and create an annotation by clicking somewhere in your image. Switch back to Move to resume standard image navigation.
Now try annotating an area: pick the Rectangle tool. Click once to select the starting corner of the area. Then click again for the opposite corner.
The Tilted Box tool may take a bit more practice: select it from the menu. Click the mouse button once to start drawing the baseline of the box. Click again to set the end of the baseline. Move the mouse to define the height of the box, and click when you are happy with the height.
Tip: the Tilted Box tool is especially useful for annotating labels in maps. Because there is an explicit baseline, the data you generate will also retain information about the orientation of the label.
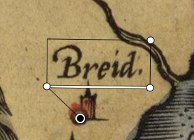 The Linked Box is a modified version of
the Tilted Box, designed specifically for maps containing symbols and labels.
The Linked Box is a modified version of
the Tilted Box, designed specifically for maps containing symbols and labels.
Click once to mark the symbol, then continue to annotate the label as you would with the Tilted Box: click to start the baseline, click again to end it, click once more to set the height. You can modify all points afterwards, by clicking and dragging them.
Step 3. Identify and Map Places
You already know how to annotate a word or phrase in a document, and identify it as a reference to a place. Now let's assign this reference to a gazetteer, so that Recogito can plot it on the map.
Click Place in the annotation editor. Recogito will attempt to provide an automatic suggestion from its supported gazetteers. You can either confirm this suggestion, or try to find a better match in the gazetteer search. If you can't find a suitable match, you also have the option to flag this reference, as an indication that no suitable match was available.
To speed up your work, Recogito will automatically search the text for identical phrases and give you the option to re-apply the gazetteer assignment to all other matches.
Step 4. Export Your Data
Select the icon in the main navigation bar. This will take you to the available export options for your document. In addition to the options listed on this page, you can also download a backup package of your work from the document settings page. We recommend to download backups for archiving and as an added security measure.

Step 5. Invite Other Users
In this final step we are going to learn how you can share your documents with other users on Recogito, so that you can work as a team. Select the icon in the main navigation bar. This will take you to the Document Settings page. In the left sidebar, select Sharing.
Use the search field at the bottom of the Collaborators box to grant a user access to your document. You can choose between different levels of access:
- Read allows users to view document and annotations, but not add annotations and comments themselves.
- Write allows users to view and annotate the document.
- Admin provides write access, and additionally allows users to edit document metadata, invite other collaborators, and perform administrative actions like downloading backups.
Congratulations!
You have successfully made your way through Recogito's most important features. By completing this tutorial, you have learned to:
- upload documents
- create annotations on texts and images
- map place references to gazetteers
- export your data to different formats
- invite other users to work with you
If you want to learn more about Recogito, check out our other help resources. To get in touch with our user community, please visit the Pelagios mailing list.